Showing posts with label knock-off. Show all posts

16 Jan 2015

diy: fitted changing pad cover 'Koeka Amsterdam' knock-off aankleedkussenhoes


Here is my third Koeka knock-off project!
For the changing pad I used their 'Amsterdam' changing pad cover as inspiration. They use a cotton waffle fabric in combination with a cotton bath-towel fabric for the middle section. These sell for about 45 euro's a piece!
Below the original version:


this is my knock-off:


...with a way better fit at the sides and corners!


material:
- cotton waffle fabric (prewashed and -shrunk)
- bath towel 70x100 cm (enough for two changing pad tops. I ripped our the side seams for the seam allowances)
- elastics
- embroidery thread
optional: fabric dye to match the colors

costs: 
My costs were for two changing pads less than 15 euro's!
About 6 euro's for 85 cm of cotton waffle fabric, 3.99 euro's for one IKEA Haren bath towel (70x100cm), about 1 euro of elastics and 1 euro of embroidery thread.
(I used dylon to dye both fabrics in the same color. The fabric dye was the most expensive, about 10 euro's but used for other projects as well)

step-by-step:
1. Prewash and iron your fabrics before starting!
It is better to let the fabric shrink before the first use instead of the second one... I prewas my cotton fabrics at a normal temperature, but then put them in the dryer with fairly hot air.
Cotton waffle fabric tends to 'bobble' after washing. After prewashing I ironed my big piece of fabric and after cutting the rectangular pieces I ironed them again, making sure that the stripes run horizontally and vertically.
2. Take the measurements and make your pattern

Making the cover requires a bit of 3 dimensional thinking. You need to 'translate' a 3-dimensional shape into flat, 2d pieces.
The cover is made out of one rectangular upper part (consisting of two pieces of waffle cotton with a piece of bath towel in between) and 2 contoured parts for the short sides.
First, measure your changing pad. Use a standard seam allowance you are used to work with. For me it is 5/8" or 1,5 cm. I used my handy parallel tracing wheel to do this.


You can either measure and draw directly on your fabric, or choose to make a paper pattern first. You can choose how wide you like to have the bath towel section. The original one goes  up quite high at the sides.
If you assemble the top part from different fabrics don't forget to add extra seam allowances where the two fabrics meet!(= at both long sides of the bath towel and at one side of the side sections of the waffle fabric.)
3. Cut the pieces:
- 1  upper middle section (bath towel)
- 2x upper side sections (waffle fabric)
- 2x the contoured sides (waffle fabric)


4. Sew the waffle fabrics at the sides to fill up to the desired (measured) width according to pattern  Pin and sew.


5. Finish seam allowance (I used a simple zigzag stitch) and fold the seams under the waffle cotton layer. Press. I used a really small top stitching on the waffle cotton to keep the seam allowances nicely in place. The topstitching will be practically invisible when you embroider next to it.

6. Attach the contoured sides:
Since it is easier to sew a straight line simply clip and open up the seam allowance (basically straighten the shaped part). Place the pieces with right sides together, pin and sew. Clip the other layer as well.
As you can see my seams don't match up here. I decided to make the center part just a little bit shorter for a nice, tight fit.


Topstitching and clipping the corners:


7. Fit the cover on the changing pad: fold the short sides under and mark the corners. You can measure it too, but there is somehow always a certain amount of 'unexpected' stretch in the fabric which you can spot and correct this way:


8. If it is needed, open up the seams in the corners up to the marking on the inside and pin the seams in a downwards vertical direction. Stitch, reinforce corners by running 3-4 times through it. Finish seam allowances and press:


9. Now it's time for a lot of relaxing handsewing!
Embroider the edges of the bathtowel-layer with blanket-stitch in a contrasting color before putting in the elastics:


This is the best time to add the little appliques too. Of course, you are free to skip them or to use a Koeka-style applique. Those are made out of felt and secured with a simple cross-stitch (like an X) with embroidery thread.
I didn't liked the flower appliques of the original cover, and made really simple and cute crochet bunnies instead. I used this tutorial


10. Last step!
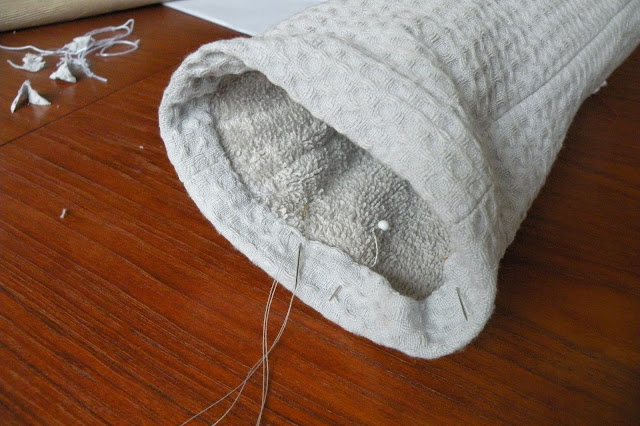
Make the elastic casing at the bottom. I used about 2 cm to do this, first folded back 0.5 cm and then 1.5 cm. Pinned and pressed before sewing.
To prevent bulking the elastics only go around the corners: 10 cm at the short sides and 15 cm at the long sides, measured from the corner seam. The mid-sections remain straight for a better fit.


Ready! ...and now make one more...
I have made two covers, and planning to make a light grey one too. Just for fun!

17 Dec 2014

diy: hot bottle cover - 'Koeka Antwerp' kruikenzak knock-off!


Now that I'm finally on maternity leave I have the time to finish my list of baby-related sewing projects. The first one is making hot water bottle bags!
In The Netherlands, you need to purchase two, stainless steel hot water bottles for the baby's bed, to keep the temperature warm and comfortable during the first weeks after birth.
Metal bottles seems odd and old fashioned, but when handled properly, they are safer to use than the rubber ones: there is no risk of tearing, leaking,  and they stay warm longer. I've got mine second hand, from a friend.

Of course, the bottles can't be placed in the baby's bed without a cover. You can buy all kinds of bottle bags, from really cheap and simple to quite expensive, like those of the Dutch brand 'Koeka'. Their 'Antwerp' series of baby textiles features waffle cotton with blanket-stitch edges.
Unfortunately it is a fashionable, and expensive brand. Their hot water bag above costs 16 euros (!) a piece. Making my own knock-off version was an easy choice. I also added an extra bathtowel lining to reduce the heat on the outside a bit. Im really happy how my hot-bottle covers turned out! They costs about 3 euro's and some left-over fabric. (The piece of bathtowel was a leftover from my baby badcape project, the cotton waffle fabric was a sample which I've got for about 1 euro)


step-by-step:

First I made the two layers. The inner layer is stitched to a width of 13.5 cm, with the seam allowances on the outside. Clipped the corners and pressed the seams open.
Then I made the outer layer from the waffle cotton (which I prewashed and put in the hot dryer to let it shrink as much as possible). For a snug fit it is just slightly larger than the inner layer: 14 cm wide.

The layers were assembled with the seam allowances between the two layers. (the bathtowel layer with the s.a. on the outside and the outer layer with the s.a. on the inside.
Before doing that I added a little crochet flower embellishment (about 9 cm from the bottom up) I used this free crochet flower pattern.


Since I love handsewing and my bathtowel layer was a little shorter than the other layer I hand-stitched the edges (bonus: the stitches are not visible from the outside) Before stitching I've put a bottle in the bag to make sure everything was pulled tightly and was free of wrinkles.


I stitched the two layers together all around, went a few times over the upper right seam to strenghten it, and then cut only the waffle layer open between the stitched lines to place the 50 cm long twill tape:


As a finishing touch I added a blanket stitch edging with white embroidery thread:


They are cute, right?

6 Dec 2014

diy holiday project: faux fur footstool


Apparently, faux fur (foot)stools are in! They seems to be everywhere, in fancy interior design magazines and in the shops.
First things first. This week we've got a very, very ugly, brown faux leather footstool. It was a family hand-down 'because-you-like-old-stuff'... Yeah.We do. We like nice, old stuff, not junk...
This ugly thing had a lid and a worn out plastic 'storage' inside. Yikes!
The only thing we liked about it were the 60's looking legs. So I thought, okay, why not remove the legs and use them for another, fancier footstool?
Until I discovered the faux fur stool-hype! Below left is one of the many inspirational pics I came across in a magazine:

I've bought a half a meters piece of very light beige, long haired faux fur for 5 euro's, and used a left-over piece of an old sheet. After just a few hours of sewing I've got my fancy faux fur stool! 


As a first layer I used the old sheet to make a fitted cover as the base for the faux fur layer. I did this completely free-hand. Simply cut a circle for the top, attached a rectangular piece for around and made a casing with elastics at the bottom. This part was whipped up very quickly!


Then came the faux fur part, which is mostly handsewing. Now this took me quite a few hours to finish!
Cutting long faux fur can be really messy, so you should use pointy scissors and stay as close to the surface as possible, to avoid cutting across the long hairs.


Of course, I came fur short for the top layer, so had to put a few pieces together. Great thing about the long haired fur is that if you sew carefully you can cover the seams easily:

Finally, I sewed the top circle to the seeth layer by hand. Again, there is almost no seaming visible, which guarantees the 'expensive' look instead of a cheap knock-off!

23 Apr 2014

Talking about the perfect fit...


Talking about the perfect fit, how about this pretty, pale pink skirt and top, Duchess Catherine wore today? I like the contrast between the elegant, minimal top and flared skirt. A top with such 'clean' lines needs to fit perfectly. Choosing the perfect color for your complexion is another important thing of course.

Let's take a look at the pictures above:

  • the waistline of the top sits at the natural waist
  • there is a perfect amount of ease 
  • shoulder width is perfect
  • look at the picture where she lifts her arm! That's how a perfect armhole should behave! 
  • the neckline lies flat, there is no gaping
  • there are no drag-lines or wrinkles 
  • the bust dart might be just a tad too high imo (hits right at the apex) 
  • skirt hem hits the leg elegantly just at the knee

It looks like the fabric is some kind of heavier (wool crepe?) jersey. The peplum has more body than the skirt, so it is probably underlined.
I tried to search the net for the original Alexander McQueen garments but could only find something similar. The top at left features the just slightly flared peplum and the V-neck, but placement of the bust darts is different. The top in the middle has the right color and dart placement, but the peplum is more flared. I guess the skirt is similar to this one below. At first I thought it was a circle-skirt but then noticed the pleats.


If you'd like to make something similar, I have the right patterns for you!
Vogue 8815 peplum top:


Butterick 5756 pleated skirt: