Showing posts with label 1960's. Show all posts

15 Sept 2014

1966 baby cardigan finished + the pattern!


So here it is, a baby cardigan worked from a vintage pattern. It's not quite finished yet, still have to block it and find the right buttons.
The patten is very straight forward and haven't find any errors. It is also a fast knit, when knitting in the evenings you should be ready in just one week.
I love the raglan sleeves! Although there are not many patterns using raglan sleeves, the fit seems to me always better. Maybe, because there is no well-defined shoulder line, which makes the sizing forgiving. I think it is a great basic pattern which you can adjust - knitting plain or adding stripes, motifs, or a cable pattern if you like.

main pattern:

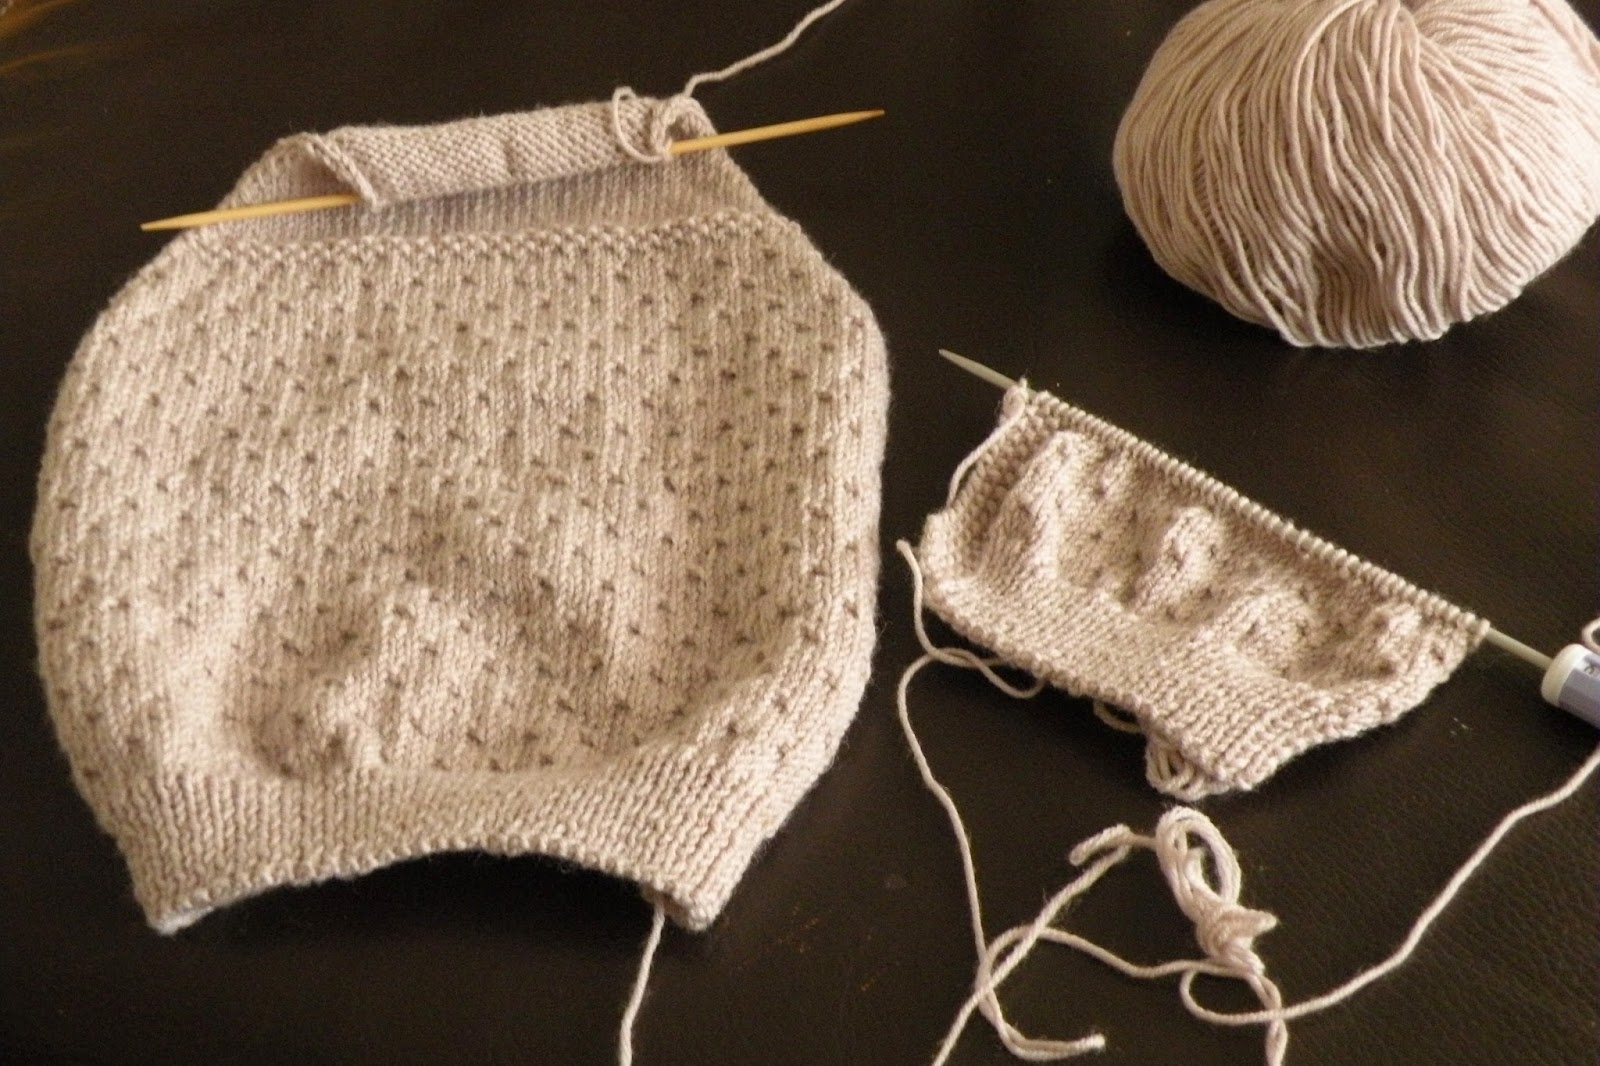
Hard to spot if you look at the original picture, but here you can see the moss-stitch border along the yoke which is knitted in stocking stitch:


close-up of the raglan yoke, this could be knitted in one piece as well:


The pattern instructs to knit the K stitches of the ribbing t.b.l., which means through the back loop. This makes decorative turned stitches, and also a tighter finish which I only used on the neck ribbing:


material & sizing:
I used my trusted Drops baby merino yarn in the color light beige. I used 130 gramms of wool, which is just a bit more than 2.5 skeins. My tension was 28 sts to 10 cm,which is approximately the same as the suggested tension of 8 sts to 1 inch.
The finished measurements came out just a tad larger than the original:
chest (underarm circumference): 56 cm (=22 in)
length: 28 cm (=11 in)

changes I made:
  • ribbing:
I used 12 rows for the ribbing at front and back and just 10 rows at the sleeves.
  • buttonholes:
I found the buttonhole with just 1 sts too small so used 2 sts (3 sts at edge, cast off 2, remains 1, and in the next row knit 1 st, cast on 2 sts and knit the remaining 3 sts (all in moss stitch)

pattern notes & tips:
  • place remaining sts of back on holder
I didn't cast off after the last row of the back but have put sts on a stitch-holder instead. Why should you cast off only to pick up the same stitches later?
  • placing buttonholes:
Rows 6 - 25 - 44 - 63 - 82 and the last one as instructed at neckband
  • sleeves:
You need to increase 5 sts in the first row after the ribbing. Here is how I did it:
K4, inc, *K7, inc* repeat ** 3 more times, K3

the pattern:
You find the pattern HERE

5 Sept 2014

knitting for baby: 1960's cardigan pattern


After testing a lot of vintage bootie patterns (not ready yet!) I decided to knit up a baby cardigan pattern from 1966. It is a raglan-sleeve cardi which appeared in the AWW. The textured pattern is really simple to follow, and as always, there is more detailing which you can't see on the original picture, like the yoke pattern below or the moss-stitch border. I choose a gender-neutral light beige color, which is Drops baby merino no. 23.

2 Sept 2014

vintage newborn baby bootie pattern from 1966


This weeks baby bootie is a 'newborn bootie' pattern from 1966. The 'fancy stitch' is easy to knit and it can be made both for baby boys and girls. Interesting detail is the picot edge which is occasionally appears on knitted tops or sweaters. Always wondered how it's done? Scroll down to read!

"A quick-and-easy gift, you can knit these bootees in a night. Make them in white or lemon and they will suit either a boy or a girl."
   

material & sizing:
The suggested tension is 8 sts to an inch. I used the same gauge as always, used fingering weight yarn, metric size 3 needles and a tension of approx. 28 sts to 10cm (7sts=1in) The finished size is 9 cm (=3,5 in) from heel to toe, which should indeed fit newborn to 3 month old babies.br />
construction:
The bootie is knitted top-down. You start with making the picot edge.
the finished bootie before sewing:


I made 2 repeats of the 'fancy stitch' after the picot edge. The instructions tell to continue until the work measures 1 1/2 in. Instead of measuring the length I repeated the pattern twice, for the same look as in the original picture (making 4 rows of small holes). Close-up of the fancy stitch with the tiny holes:

The instep is shaped by knitting the instep and picking up stitches along the edges. A common problem can be holes in the inner corner.

trick: how to avoid holes?
If you have ever tried to knit socks you might be familiar with the holes in the inner corners when knitting a sock with a heel flap. There are a few sock-knitting tricks to avoid those holes. These holes are actually created by the stretched-out strands of the previous row, between the last stitch before starting to knit the instep and the first stitch of the instep. Here we are knitting tiny booties, so there is just one trick you need to apply: when you pick up stitches along the edges, pick up an extra stitch next to the inner corner. Then you knit this stitch together with the stitch next to it in the next row.

the toe-shaping:


trick: seaming along the sole
If you don't do this in the right way you'll end up with vertical lines along the seam on the right side or a very thick seamline. Here you can see how I pick up the middle loop of the chains along the edges (seaming on wrong side). This way it looks good from the right side and the seam won't be thick!


picot edge:
The picot edge in knitting is actually created by making a row of holes (K2TOG, YARN OVER) Then the work is folded along the row-lines and sewn or knitted in place. This creates the scalloped edge. These row of small scallops are called picot.
In this pattern you make the picot edge like this:
  • you knit 3 rows in stocking-stitch
  • knit a row with holes
  • knit 3 rows of stocking-stitch again
  • fold and knit together the loops on the needle one by one with the loops of the cast on edge

did you know...
...that a picot is a loop of thread created along the edge of lace, ribbon, crocheted, knitted or tatted material. The word picot is pronounced [pē' kō]. It is a diminutive derived from the French verb piquer, meaning 'to prick'.
   

the pattern:

18 Aug 2014

vintage maternity fashion - how did they do it?


Another blogpost I had to rewrite after accidentally deleating everything, inclusive all of the pictures (and believe me, it was a picture-heavy post!). Frustrating, and it took me quite some time to rewrite it.
As I had many of the pics on my pc, I didn't have the sources anymore (most pics are from etsy, newspaper images from the AWW)

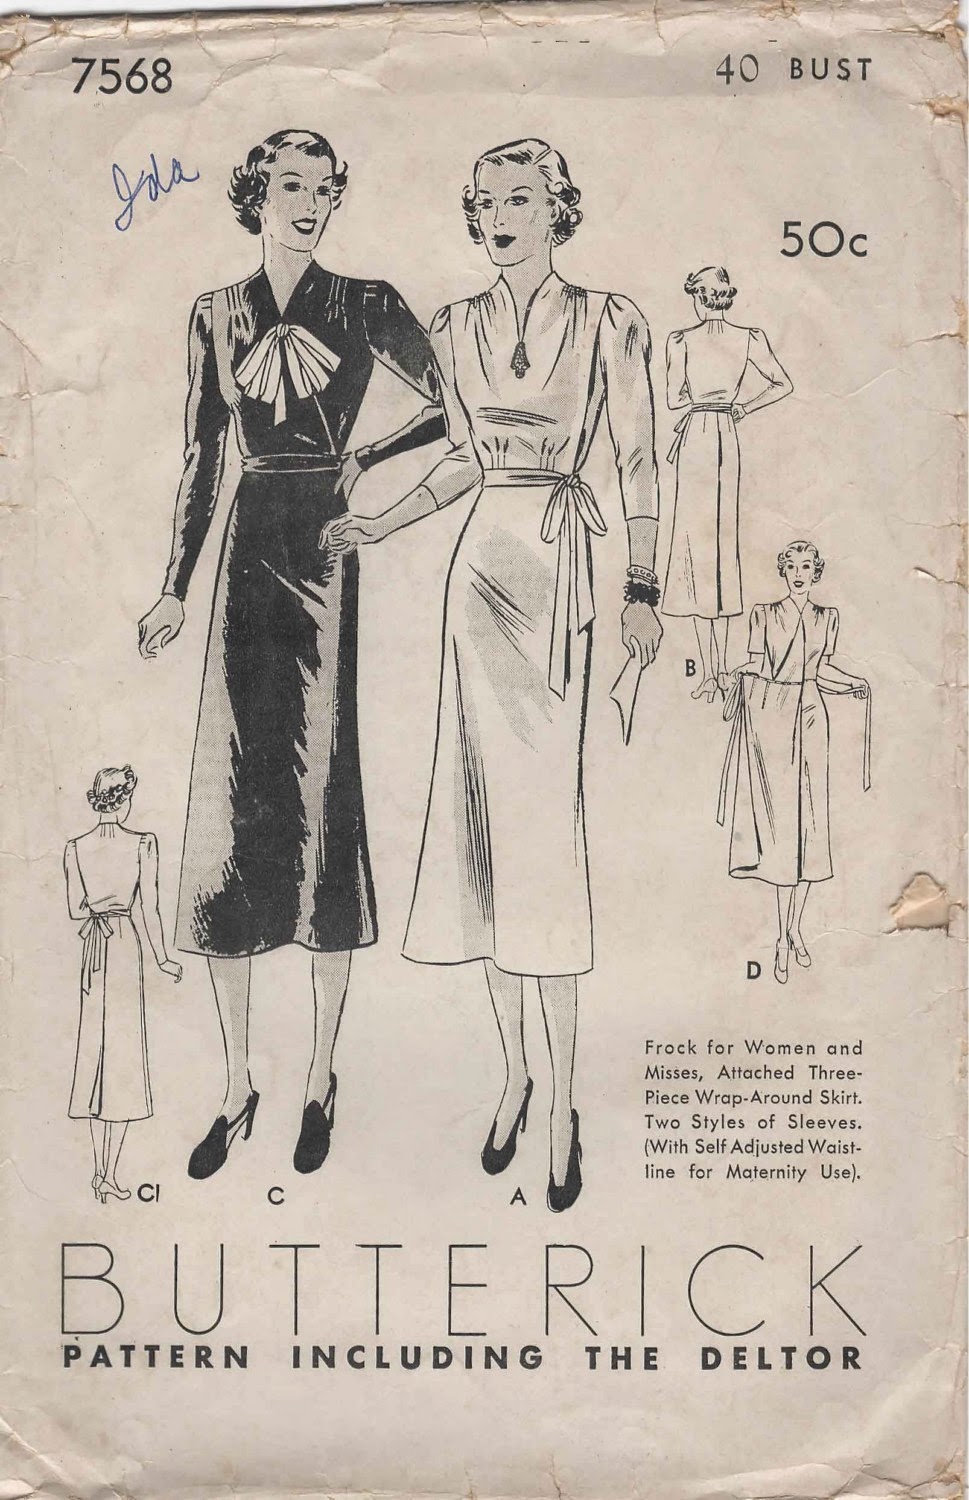
1930's
Overall, 30's garments weren't easy to convert into maternity versions. The fashionable long, statuesque lines of the dresses couldn't hide a baby bump for a long time. In the 30's pregnancy was also something a woman wanted to  hide, so there was not a lot of choice is specially designed garments. The fashion advise was to dress like the 'broader women' and try to cover up as much as possible. Below two wrap dresses which sort of could grow with the baby bump. The width could be adjusted at the side with ties. I can imagine that it worked for a small baby bump, but I'm convinced, with the shifting of the side seam the front part of these dress should get out of balance:


Entertaining and dinner parties were typical 30's activities for women. For those occasions pregnant women were advised to wear a house-coat with embellishments to take away the attention from the growing bump instead of an evening dress. Something similar to the house-coat below, which has draped sleeves, bodice and gathered front panels which could be adjusted:


1940's


The 40's were the war-years. There was not much money to spend on a full maternity wardrobe. Women had to wear garments which could be refashioned after the pregnancy. There are quite a few maternity dresses which look like a normal dress, just with extra width added at the sides of in the back.
did you know......that Veronica Lake was pregnant when filming the movie Sullivan's Travels? Her baby bump was carefully covered at all times, but you can see her expanding bust-line and rising waist line in the pictures below:


The ultimate maternity-wear is of course, was the wrap-dress. At left a 'from-beginning-to-end' garment which fastens above the breasts and can be opened up when the belly grows. At right an 'unusual wrap dress', I only don't know how it can be adjusted. Probably opening up the pleats which are initially sewn down? What do you think?


The wrap dresses below has a bodice with a fixed width and a gathered skirt that can be tied as needed:


The other simple maternity solution were wide dresses with front pleats in the bodice, and wide skirt. The size could be adjusted with a tie:


While most maternity dresses had extra fabric at the sides or in the back, these below have a fitted back and gathered front which can be adjusted with ties:


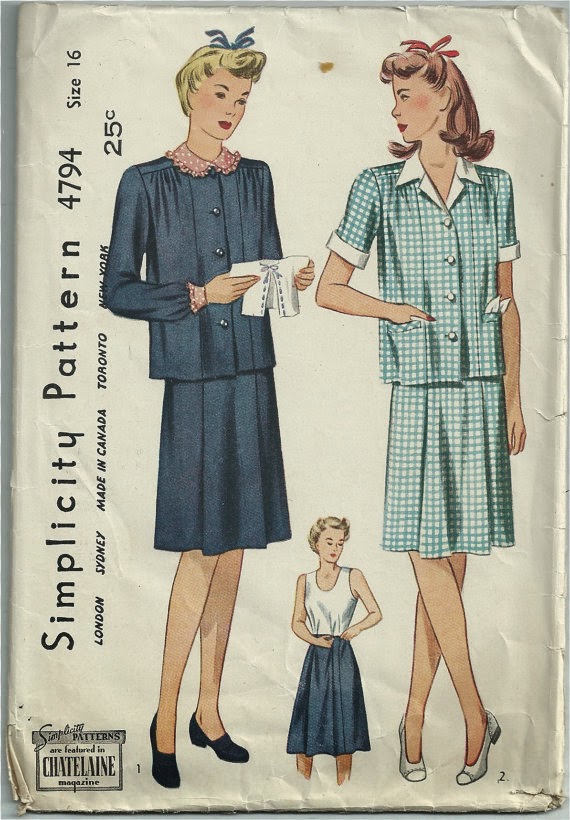
There were maternity frock and jacket ensembles too:


Also skirt and blouse combinations were popular instead of frocks, for the advanced stage of the pregnancy, because of more coverage. The set on the left features a wrap-skirt with a gathered, wide blouse. The pattern at right is interesting, because it features a wrap-style slipdress with a skirt made out of fashion fabric  in combination with a wide blouse which can be clinched in if needed with a belt:

Let's take a look at the skirts. How do you like this one below? Quite a construction, right? It has a cut-out part for the baby-bump? It is adjustable with a tie in the front and for added security it has built-in suspenders too!


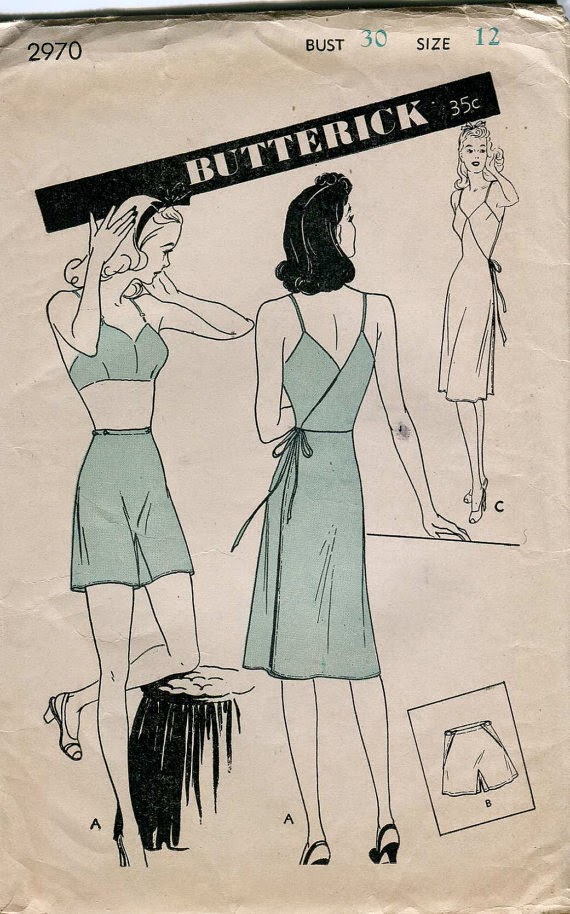
Slips and underwear had a tied wrap-style too, often with an opening in the back or extra fabric at the sides:


In the 40's women wore pants and guess what, there were solutions for pregnant women too! At left an expandable front with adjustable belt and button closure. At right slacks with gusset-inserts. The width could be adjusted with buttons at both sides:


1950's


In the 50's matching sets of separates were very popular. Until the very late 50's we see more skirt-blouse or skirt-jacket combinations, rather than dresses.


Then there were the elegant coats (left) I love the simplicity and clean lines of it, without gathering and pleats! At right the 'glamorous, very versatile, all-purpose' duster-coat, which can also double as a dress:

The 50's were the era of the cigarette pants and pedal-pushers. Below two different options for the baby bump, the 'hole-in-the-pant' solution and the 'cover-flap'. I actually quite like the flap-idea, where the front flap sides form the pocket inserts. The pocket insides close with ties which can be gradually adjusted:


So, how about skirts? In the 50's skirts were made using either the cut-out or the flap-method to cover up the growing bump:


1960's


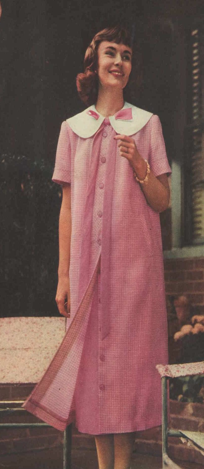
When thinking of maternity fashion we Mad Men's Betty Draper comes to mind. A great variety of dresses, combinations of tunics, skirts and pants were popular. I actually quite like the wide tunic-fitted skirt combination and the A-line dresses could be very flattering on a smaller size baby-bump imo:


Construction-wise there is not much excitement anymore when looking at maternity garments. By the 60's the use of elastics in pants and skirts was widely spread and also the elastic fabrics appeared on the market. Most skirts and pants had a belly-panel, similar to what we are used to nowadays, with an elastic casing or an inserted panel made out of elastic fabric:


The fun thing is though that in the 60's the sun-dresses and swimming suits appeared! The swimming-suit at left is made of cotton fabric. It doesn't look really flattering, does it? It looks like an enlarged version of a baby dress of that time. Can you imagine it being soaking wet after swimming?


After the 60's in the 70's the tunics and wider dresses were popular until we arrive to the fashion-disaster-era of the 80's, with very unflattering, high waisted and wide pants, dungarees and over-over-oversized dresses...