Showing posts with label alteration. Show all posts

7 Apr 2014

sewing for victory blouse - 3. muslin: the good, the bad and the ugly


How is your project going? Over here it is muslin time! The first muslin isn't perfect of course, but it looks nice already. Now let's see a lot of pictures!


muslin front and and back view:
Overall: I like it! Can you spot the problems?

  • obviously, the collar is inside out, but besides that the collar edge needs to be shortened
  • my one-piece yoke looks good!
  • ...though something went wrong because it isn't lying flat...
  • sleeve is too tight plus underarm room too small (I feel this when I lift my arm)
  • the back pleats are placed too close to the center and are pleated in the wrong direction as well
  • swayback adjustment in the back
  • shorten the hem
muslin adjustments:
1. sleeve:
The tight sleeve/wobbly yoke problem was partly solved when I discovered that I've put the sleeve in backwards... I guess I just looked at the wrongly sewn collar seams as reference. Unbelievable, but when I started to sew I used to make this mistake on almost every garment I made! Usually just one sleeve though...


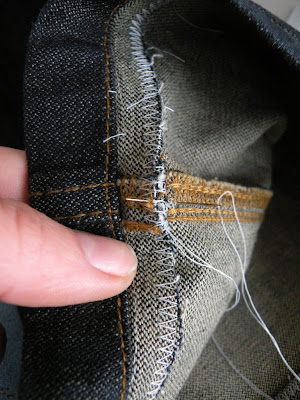
After a quick change (setting the sleeve in the right way) there was enough room to move my arms, and the sleeve looked much better, but there was still a little puckering visible along the armhole/armpit. You can see it in the picture below on the left, and how I corrected it by pinning the excess fabric out on the other side:

This is a modification which I need to transfer to my pattern pieces. The excess will be transferred to the front dart leg. (Note: my dart isn't stitched down, it is folded in a pleat to release fullness at the top)
To keep in mind: since my action modifies the armhole it will also affect the sleevecap!

2. collar:
The problem is that the collar of the Marfy pattern is made for another type of convertible collar. I marked the original points in the picture, with a drawing of the original and the shape of my new collar:


I could draft a new collar, but I choose an easy solution: I'm going to round out corner A and add a triangle shape from corner B down to fill the gap.

3. back pleats:
No idea, what happened here... anyway, the arrows mark the place where the pleats or gathering should be:


4. swayback adjustment:
This is an easy one, since I have to make this correction on almost every garment I make. You can already see the excess fabric pulling up below the back darts. (Observe that the fullness of the back looks right, the upper part of the back darts is in the good place!)

I can either pin out the excess fabric and add width at the sides or just try to add width at the sides and shorten the lower dart legs plus the blouse hem.

5. shortening the hem:
I often wear my blouses over my skirts or trousers, so I prefer a shorter hem. Also, I'm short-waisted, so a shorter blouse looks more in proportion on me. The length under the waistline will be still enough to tuck in in a high-waisted skirt:


6. other:
  • I folded my front tucks on a vertical line instead of folding in the shape of the dart legs. I also only stitched in the middle, while I could taper it and stitch down a longer section.
  • Besides the other sleeve adjustments above I might lengthen the sleeves just a bit.
Next up: muslin adjustments
For other Sew for Victory posts click here:
1. project plan
2. style, pattern & fabric inspiration

12 Apr 2013

How to shorten a pair of jeans the right way - tutorial


This might be not an exciting post for someone who is used to do this on a regular basis but I'm sure beginners will appreciate it. And by the 'right way' I mean: as opposed to how my BF's mom does it. Scroll down for a picture...

I've read about this method somewhere in the early 90's  in a magazine. The idea was to cut the original hem off and reattach it again. I must say, didn't used for myself that much but I've found it really handy to shorten my BF's jeans this way. Sometimes it's hard to find the right width/length combination or you buy a pair of pretty jeans on sale with the wrong length.

But, some pants are made extra long for a purpose. Why?
Especially designer jeans, but also cheaper, workwear jeans (like the one below) usually come with just one, standard length. The reason is that they produce only one length for one waist size, because they expect that you want to have perfectly fitted clothes an have the pants altered to your special measurements. If you pay a lot of money to buy those expensive designer jeans they always offer a service to alter it to your measurements. However, usually they won't do that with workwear...
Nowadays, we aren't used to that anymore, so ready-to-wear jeans fabricants offer one waist size in several lengths. The idea is: you just pick up the right length an go. If it fits approximately it should be good enough.
The good news: it's easy to fix!

So why don't we just chop off the hem of a pair of jeans?
- To sew a pair of jeans they use a thick thread, often in very special shades which you can't find on the market. There are probably similar colors but the thread would be too thin. And why would you bother to buy thread just to hem one pair of jeans anyway?
- Another reason is, especially with faded or distressed jeans the hem is often part of the design. They assemble the jeans first before adding design elements of fading or distressing the fabric. If you look at the jeans below on the left, you see that this finish can't be reproduced at home.


Below is what you definitely don't want to end up with!!!
There is one thing left, you need to 'recycle' the original hem somehow.


The method below is what works for me, it's quick and easy. Important is that the width of the original hem is about the same width as the new hem, so it works only for straight legged jeans. (And for children's trousers as well.)
I used white thread for the demonstration, but for a really neat finish I'd choose dark blue or other color similar to the color of the jeans.

1. Measure and mark the desired length you want to remove.
Fold the hems up like below. What you see of the wrong side of the fabric is 1/2 of the the total length you are going to remove (black line)

Important!
The original hem is going to be folded down at the end so it adds some extra length, but most of the time this is not that much.
If you have a wide hem or just want to work perfect, you could subtract the width of it from the total to-be-removed length first and then divide that amount by 2. (That would be then your black line below)

For example:
- want to shorten jeans total by 3 inches
- have an original hem that is 1/2 inches wide
That would be:
3 - 1/2 = 2 1/2   and then: 2 1/2 : 2 = 1 1/4
My folded wrong side (black line) would measure 1 1/4 inches


Press well. You could pin it as well, but for me pressing with steam works fine:


2. With a small stitch length (I use about 2.5) stitch as close as possible next to  the original hemline on the wrong side. Match the side seams carefully like below:
 

This is what it looks like from the right side:


3. Trim the excess fabric. I usually leave as much seam allowance as the original side seams use:
 

4. Finish the seam allowance. I use a wide zigzag stitch (length 1.0-1.5 and a width of 5, this is the max on my sewingmachine)
Repeat the same for the other hem.
 

5. Turn the hem back.  Press & steam well, with the seam allowance facing upwards on the inside:


6. I secure the inside along the side seams with a few stitches. I found this way it stays better in place and won't roll back when washed:
  

This is how the finished hemline will look like after you have recycled the original hem: