24 Oct 2011

Cornstarch for fabric?

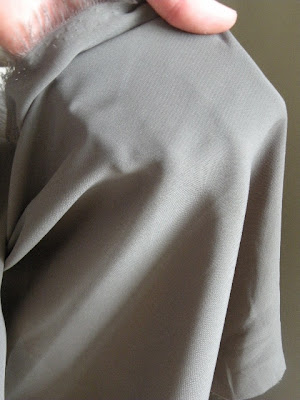
I mentioned the slippery fabric which I want to use for my Jasmine blouse. I'm sure you can imagine it shifting all around while I'm trying to cut the pattern pieces out. It would be a nightmare, especially with curved lines. The shape of the finished garment could be ruined.


The question is, how to handle such 'slippery' fabrics? The answer is, you have to stiffen it some way. When I think of stiffly starched fabrics, I think of the old fashioned bonnets of nuns and nurses... or the bonnets of the traditional Dutch folks-wear (You can see a few pretty ones of those here) And of course, the petticoat-stories of my mum! She used to tell us when she was young in the 60's they didn't have money to buy a really full petticoat and she used to use a lot of starch in order to make the petticoat stand out. When you would put it on a table it would stay upright and won't collapse!

In the US you can buy a starch spray, but I couldn't find it here, so I turned to a natural starch: corn starch! (I really love the 'granny knows' type of good old tricks...) Cornstarch is known from the kitchen, it is used for binding soups and sauces. It is 100% natural, so it won't cause any damage to your fabric. After sewing the garment you can simply wash it out. Here is how to do it!

Important:
- only use it for fabrics that can be washed in warm water! (cotton, synthetic that won't shrink)
- make a muslin from your pattern first, since you can't really see the shape of a garment  when sewing since it will be stiffened!

You need:
- corn starch
- cold water


1. Combine cornstarch and water, mix until smooth. I used 4 good tablespoons for 1 liters of water. The water will turn a bit milky:


2. Cook over medium heat stirring until it gets thick and starts to shift a bit. It gets translucent, reminded me to wallpaper glue:


3. Solve the mixture in more water (I used 2 more liters) and rinse your fabric:


4. Hang the fabric somewhere where you can hang it evenly.  This is really important because you don't want the fabric grain to shift! Once it is dry and stiff you can't really correct this. Press after drying:


And the result is with starch (left) without starch (right):


Once your garment is ready, wash it as usual in warm water, this will solve the cornstarch. (Actually the picture above is also an 'after-starch' picture.)
Let's start sewing!

20 Oct 2011

The finished fourties-style blue Burda dress!


Fabric: cotton
Pattern: Burda magazine 10/2011 #125 'Little black dress with lace inset'
Time to complete: well, quite a few hours (again), mainly due to the seam finishing with bias band.
I wanted a vintage style dress with an inset and I fell in love with this pattern the moment I saw it! It is a petite dress, so I took size 17 (which is an equivalent of size 36) And again, it is a size smaller than my measurements. Since I'm short waisted I just lengthened the bodice by 1 cm. I didn't think the straight skirt of the original dress would look good on my figure so I adjusted the skirt pattern to make an A-line skirt of it. Here is how I did it.
The fabric I choose has a pretty, matte, satiny shine but ravels like crazy, so I finished the seams with bias tape. Unfortunately the shop ran out of the pale pink one so I had to do the skirt with a dark blue tape.
Instead of a lace inset I used the main fabric and added a few buttons.
The fit is great, it is fitted enough to look beautiful but there is enough room for me to comfortably sit in it.

Finishing the hem with bias tape

How to finish a hem if you don't have a dress form?
Having a dress form can certainly come handy if you are at the last phase of making a garment, the hem finishing. It makes the measuring easier. I don't have a dress form, but I figured out a way to get the hemming right very quick and accurate. I like my skirts just falling on/above the knee.
I like to finish a hem with a contrasting color bias tape or ribbon. On my blue dress I used a dark blue bias tape, since the shop run out of the pale pink one I started with (isn't it ridiculous?)

How to get the length right?
- I pin the seam allowance of the hem in place
- I put the dress/skirt on and adjust the hem seam allowance one side of the dress in front of a mirror (just with a few pins)
- I take the dress off and measure how long the skirt should be at the mid front, mid back and at the sides (For me it is usually 1 cm shorter at the mid front than at the sides and back)
- I pin the hem again, measuring at every 10 cm from the waist down
- I put the dress on and check if the front and the back length are even and the right and left side are even
- Take the dress off again

Bias tape finishing:
- I press the hem from the wrong side of the skirt (with the pins in place)
- I remove the pins and cut the excess fabric, leaving 2 cm from the fold:


- I sew the bias tape with the usual seam allowance of 1.5 cm (5/8''), placing the bias tape with the right side to the right side of the skirt:


- Cut 1/2 of the excess fabric (0.6 cm=1/4''): 


- Fold the hem and press again:


- Catch-stitch the bias tape:


This leaves small dots of thread on the right side of the fabric, practically invisible from a distance, but I really like the way it looks:

9 Oct 2011

Seam finishing on the Burda dress


I need to finish this dress because I want to wear it to an event next wednesday. I think I can get it ready in time since the next 2 days I'm off from work.

Things to do: 
- assemble the skirt
- attach it to the bodice
- insert the invisible zipper
- make the collar
- finish the seams

I already started with finishing the seams. Because I didn't want to line the Burda dress and the fabric ravels like crazy I decided to use 'Hong-Kong binding'. The hong-Kong binding looks really neat and the seams don't get bulky either. Usually, finishing the seams is my least favorite part of sewing but now I really enjoy it. Probably because the results are so satisfying...
I used a contrasting color bias band (of course!). This time I choose pale pink. I also used it for finishing the sleeves. The sleeves have small cuffs and I really needed to cover up the raw edges without getting all the layers bulky.

"The Hong Kong binding seam finish encloses the raw edges of the seams inside strips of bias. Both sides of the seam require two passes to sew the bias, and because it is so labor-intensive, it is mostly used in very high-end clothes. This method is especially suitable for heavy fabrics and for summer garments that you wouldn’t want to line."
Description from Burdastyle

The steps:
1. sew bias band on the right side of the seam allowance, with raw edges matched.
2. turn the bias strip over and press the seamline
3. wrap the binding around seamline and pin in place
4. stitch from the right side at the line where the fabric and the bias band meets (your stitches will be 'invisible')
5. trim excess from wrong side

6 Oct 2011

Jasmine blouse muslin perfected!


At last, I've made the second muslin for the Jasmine blouse.
To start I've cut it just a size smaller - and the difference is impressive! Soooo pretty!
The only thing I've changed is to make the cuff a little smaller - I took out about 1.5 cm
That's it! Even the length is just right.
The fabric I choose is really slippery. I fell in love with it in the store, but now I'm freaking out, how am I going to cut it?!


The fabrics I choose are synthetic (don't feel like synthetic though...) with a beautiful drape to accentuate the shape of the blouse. I'm going to make a grey blouse and I've got fabric for a dark blue blouse with a cream colored collar:


3 Oct 2011

Working on the muslin again


Yesterday 5K city run. Thought my lipstick should match the pink ribbon on my cap of course...
Did not much sewing but took the Jasmine blouse muslin apart and cut it again, a size smaller.
Tomorrow new pics of that version. Did some fabric shopping for it too!!